Tuesday 30 August 2016

Four Healthy Desserts That Taste Seriously Amazing!


OH boy, my sweet tooth is really coming out to play this week! I didn’t make a qualifying nationals total over the weekend, so I have to hold my weight until the next competition this Friday – Nothing but healthy eating for me, so that means getting creative with my food to keep the cravings down.
With that in mind, I wanted to share with you some of my favourite healthy recipes that cover a range of lifestyles and ACTUALLY taste amazing.

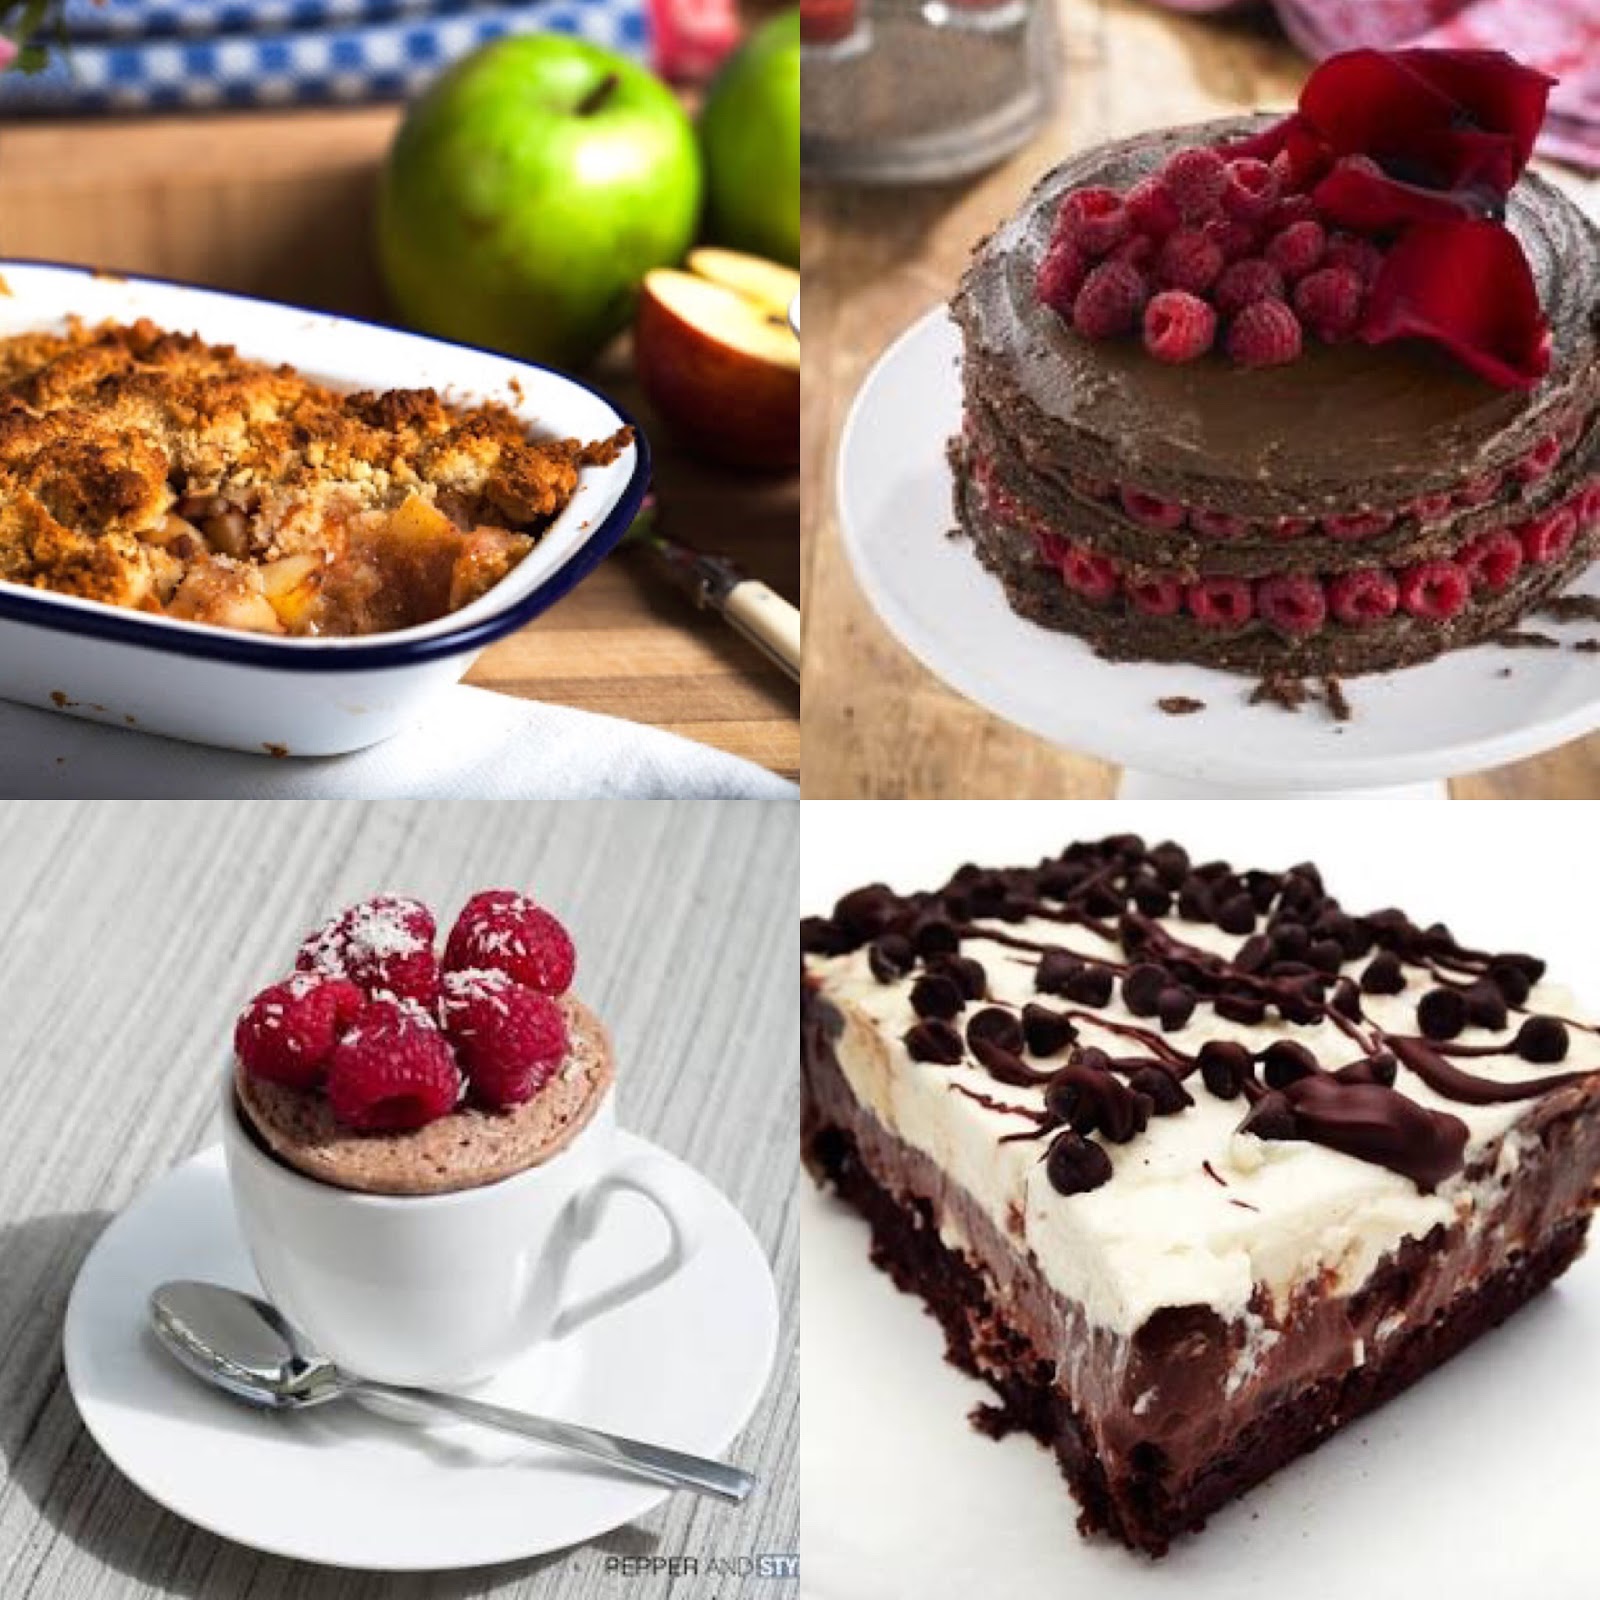
LISTED BELOW IN CLOCKWISE ORDER

HEMSLEY + HEMSLEY Apple Crumble with Ginger Crème
Having a gluten free family member means I am always on the lookout for scrumptious desserts. A couple of weeks ago I made this crumble, and minus cooking time it took me less than 10 minutes to whip together. A little squeeze of lemon juice across the apples, and the rest of the flavour is packed into the crumble. Perfect for a rainy day, and breakfast the next morning!

See the recipe here

DR LIBBY Raspberry and Macadamia Chocolate Torte
Probably the cleanest of the lot, this Torte is reasonably simple to make providing you have a food processor, but does need to be stored in the fridge. If you don’t quite feel ready to try the Avocado “Chocolate” Mousse, you could always substitute it for your own alternative – the base is still pretty tasty!

You'll have to purchase the eBook for this recipe here

Protein Mug Cakes
The perfect treat at the end of a hard day for one or two people. Have fun experimenting with different flavours until you find your favourite. Peanut butter, coffee, vanilla, orange and almond – anything goes!

See a couple of recipes here and here

Paleo Chocolate Lasagne – a little bit naughty but oh so good!
I’ve made this mouth-watering dessert a number of times now for family dinners and charity events. It’s OH so rich, goes such a long way and tastes far from healthy! I tend to pair it with some ice cream, or dairy free equivalent, but it’s just as good on its own. Definitely one to eat in moderation!

Recipe

Base
½ cup Butter or Coconut Oil
½ cup Coconut Oil
1⅓ cups Coconut Sugar
1 tsp Vanilla Extract
1 tsp Baking Powder
½ tsp Sea Salt
2 Eggs
½ cup Coconut Milk
¾ cup Cocoa Powder
1 cup Dark Chocolate Chips
1 cup Almond or Coconut Flour

Preheat oven to 180°C. Mix all of this together, pop into a lined tin and bake for 30-35 minutes.

Middle
200 gms Melted Chocolate
4 Eggs, Separated
100 gms Butter, Melted
2 tsp Coconut Sugar

Beat egg whites until soft peaks form. Add sugar and beat.
Place chocolate in a heat resistant bowl. Pop some water in a saucepan and place over heat. Put the bowl on top of the saucepan and melt over a gentle heat. Beat in the egg yolks and butter.
Add the chocolate mixture to the egg whites and fold through.
Pour on top of the base and chill.

Top 
Once chilled, top with whipped cream, chocolate chips and/or melted chocolate.

I'd love to hear what you think of any of these recipes, or if you would like to share your favourites please get in touch - I'm always on the look out for new kitchen inspiration!

 photo mama-sig_zpsgafee8qc.png

Sunday 21 August 2016

The Kiwi DIY Bride


It’s a bit of an oxymoron, isn’t it? “Kiwi DIY” and “Bride” just don’t seem to gel the same way as “American DIY Bride”. We fall in love with an item on Etsy and then have our dreams dashed by the horrendous shipping costs, or the most perfect tutorial online is courtesy of items from Home Depot - it’s time to put a stop to that right here and now and embrace our Kiwi ingenuity.

Being a DIY Bride in New Zealand doesn’t have to be hard, it simply calls for a little more creativity and organisation. Some would think I am making things harder on myself by not utilising a wedding planner for our out of town wedding, yet here I am breaking the boundaries (We will see how that goes later down the track), and I want to show you how too.

Once you have the big things out of the way (see previous post here), it’s time to start thinking of a theme. Hopefully you will have a rough idea of what this is going to shape up like given you’ve already booked your venue, and your Pinterest board is probably chocka! If not, you can check mine out here.

At the top of my list to recommend is making your own stationary. I invested in a monthly subscription of Adobe Photoshop to make Save the Date cards myself, and invites are currently in production thanks to a huge helping hand from my Sister in Law to be, Lucy, from Magill Designs (now we have got the hang of Glyphs). If you don’t have a Photoshop expert at hand, YouTube is fantastic reference point for step by step tutorials. I'm using this subscription to make name and table number cards, seat reservation signs, programmes, menus, photo boards, Thank You cards – the list is endless!

If you have lots of time on your hands, you could make paper folds and envelopes yourself, but I will be purchasing these things. Etsy and AliExpress have great options, but if you want to support local like myself, and want a hassle free option that is similarly priced, head along to PINCPocketfolds. Remember to keep it simple, and you won’t have any issues at all.

Thrift shopping is another fantastic way to uncover relics and items for your wedding. From rustic, to chic, to glamorous there are so many perfect pieces just waiting to be dug up. Look at the bigger picture when it comes to some items, would a coat of paint or some floral decoration bring it back to life? For Christchurch Brides, Ferry Road/Woolston area have some absolutely fabulous shops to get you going. Dig around your Grandparents homes too, you might get lucky! I’ve also found some bargains on Trademe, and often save searches so I’m first to jump on bargain “Buy Now” auctions.

Don’t get me wrong, I definitely know how to appreciate a beautiful bouquet of flowers, but for the budget conscious Bride, this can save you a small mountain of cash. You can put your bouquets yourself, or even with your Bridesmaids the night before the Wedding. Christchurch Brides, Moffat's are your go-to flower wholesaler for in season blooms, and the options are endless when it comes to tying them together. Lace, ribbon, hessian, small family heirlooms are just some ideas in this department.

Have you considered making your own Wedding favours? Homemade treats or preserves, scented candles, little succulents – the list is endless. Another fantastic idea is to simply donate the estimated cost of the favours and donate to your favourite charity. It’s a great way to give back and well received by guests.

All in all, anything goes when it comes to DIY. With time on your side, you can afford to chop and change things to better suit your theme and make your day all the more special. My key piece of advice? Accept all the help you can get, and enjoy the biggest party you will ever hold!

If you have any ideas, or want to ask any questions, do get in touch – I’d love to hear from you.

 photo mama-sig_zpsgafee8qc.png

Wednesday 17 August 2016

Bridezilla - Be Gone! Your Simplified Wedding Planning Guide


I just LOVE wedding planning. Being organised from day dot has certainly helped keep the stress levels down, and thank goodness, because my oh my have I heard some horror stories in recent times! I’m no expert, but I thought sharing a little of our experience, tips and tricks for keeping our wedding (and event) planning stress to an absolute minimum will hopefully assist you gorgeous Brides and Grooms to be.

First off, keep it simple. You don’t need a 24 page checklist to tick off month by month to plan your big day. Getting the big things out of the way (see below) makes for a far more enjoyable experience, and leaves far more time to potter along as needed.

Planning your big day can turn into a nightmare if you don’t sort the big items first, especially if you are wanting it in peak season. Even planning our wedding over a year out we found we were having to get nifty about securing some things (hello draining the bank account paying in advance). Bear in mind, we are getting married in Queenstown so the options are far more limited, but our “to book” list consisted of these:

  • Venue (and rainy day plan)
  • Celebrant
  • Band
  • Photographer
  • Videographer (I must admit I only did this last month, but it was a mission finding availability)
  • Guest Transport
  • Accomodation
  • Hair and Makeup Artists
  • Flowers
  • Cake (and caterers if required)

Secondary to this is of course the Dress, which if not taken off the rack can take a few months to arrive. Now, I never got that crying moment the Brides on TV have, but I think when my dress arrived last month and tried it on, in that moment I realised that this was real.

For us, it was important to get our Save the Dates out well ahead of a normal schedule as our big day is so conveniently tied in with the Motatapu race, and the NZ 2017 Golf Open, so small town accommodation was going to become an issue very quickly.

Once all this was out of the way, we could breathe again. You won’t all be the same, but this whole process has become a bit of a hobby of mine. I’m constantly pinning ideas (@mamatoldme), have favourited searches on Trademe for items new and old, am scouring fashion sites for dresses, suits and shoes – all of which I can highly recommend, especially if you are not having a wedding planner like myself.

Below are some of my favourite blog sites, bursting with inspiration for weddings of all budgets:


Just under seven months out and invitations are underway, rings are purchased, and the initial appointment for suits is today.

A lot to digest, but I hope some of you beautiful Brides and Grooms to be have something to take away from this wee post. Let me know if you would like to see more on the progress front, or have any questions for Mama.

Congratulations, Enjoy, and Good Luck!


 photo mama-sig_zpsgafee8qc.png